Tuesday, 20 October 2015

Two hours with Fusibles and Transfer Foil - Denise

Our latest playtime saw us trying out different ways of applying transfer foil. We used Vilene Bondaweb and Hot Spots, MistyFuse, and Kim Thittachai's KK Glue. As usual, most of the items we use are sold at Craft Arena, although I must admit my stocks of some are a bit low at present! We did get carried away with our play, and must remember to take more pictures next time!


First of all, we tore up painted Bondaweb which we applied to white fabric - I just love the effect this gives, use diluted paint, not too thick).


We then put transfer foil on top, coloured side up. Use a medium setting to release the foil; too hot an iron will melt the plastic carrier. Don't use your best iron, I bought a cheap one from my local supermarket to use in mixed media work. I first used red foil, which I stroked with the tip of the iron, then I used aqua foil which had already been used in another project. You can see the dots left behind which were transferred to this sample - I don't throw away any foil until it has all been used!


This is the sample with the transfer foil added. I'm not sure you will be able to see the full extend of the sparkle, but believe me, it's there!

I decided to do a bit more to this the following day, and you can see the results a little later.


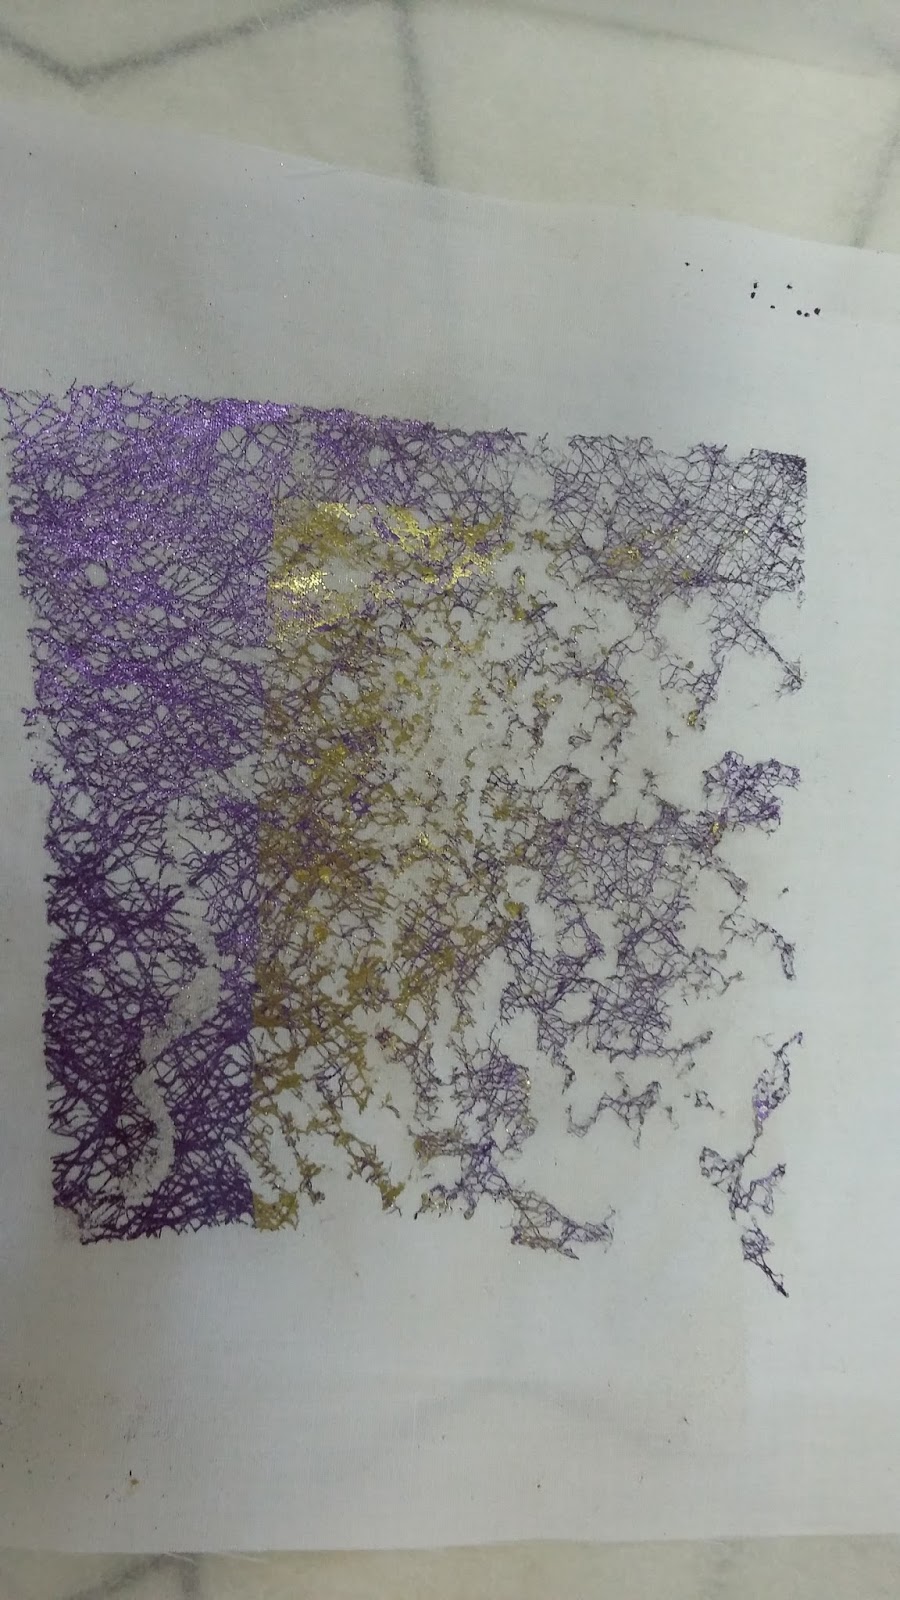
In this sample, I have taken the red foil I used previously, and applied it to black polycotton with MistyFuse - a fusible web without paper backing. This is a great medium, as you get a spidery, webby effect. If you use too hot an iron, you do tend to get a solid mess, but just rub it, and the excess foil will flake away from the areas without glue. I then used purple foil which adhered to the gaps in red foil.


Time now to play with Hot Spots. This is in the form of dots on a paper-backed glue which is available in two sizes on A4 sheets and inch-wide strips. In this sample I have cut wavy lines through a piece of the strip and applied it to black polycotton, then applied purple foil. You do need the iron a little hotter for this than bondaweb. This is great for specific shapes you would like to add to your projects. The Hot Spot paper can be put through a cutting machine, cut with scissors or punched out. Do be careful not to cut it over your work though, as some of the dots do tend to fall off the paper and onto your work, and you won't realise until you have applied the foil. Once applied, it is washable, so it's great for adding to clothing.


We tried using different tools for heating the foil. I'd not tried using a soldering iron before, and found out why! It heats up too much and melts the foil unless you are very careful! Not a success.


This sample was foiled with a Clover mini-iron on painted Bondaweb. 


These irons are intended for quilters to use to apply binding, and to iron small areas of fabric to get a good crease, but mine has never been used for that and couldn't be now! These irons are quite expensive, but I can get a cheaper alternative. If anyone is interest, let me know via the website.


The following day I decided to knock back the shine a bit by laying over some light purple chiffon I had in my stash. I then free-machined over the top...


... and then zapped it with a heat gun. As the fabric was synthetic, it did buckle a bit, adding to the texture of the sample.


More play soon!

Denise

Monday, 19 October 2015

Two hours with Fusibles and Transfer Foil - Lisa

So this week we played with fusibles and transfer foil, I have only used transfer foil once before so I tapped into Denises' greater knowledge. Fortunately she has a big box of painted bondaweb and we used white cotton for base fabric. Work on an ironing board and use the stand of your soldering iron or an upturned flower pot as the tip gets very hot.


We torn bits and layered it on, ironing between two sheets of baking parchments.


We used the tip of the iron and the side to apply the transfer foil - colour side up!


You can add more or less, different colours etc.

 
I tried some misty fuse which gave a nice effect. if the transfer foil looks a little thick, give it a good rub together and it falls off where it hasn't stuck.
 
 
You can then apply a second layer/colour which will pick up the leftover glue.

 
I tried some Vilene hotspots, small and large, which give a different effect again. this comes as A4 sheets and strips.
 

I then tried using the soldering iron to apply the transfer foil onto bondaweb. This was not very successful, although maybe with some further experimenting it would be better. Denise used her Clover quilting mini iron - I don't think she uses it for quilting - she will post about that.

I'm probably going to do some stitching on these samples, either hand or machine, I'll post pictures later.

Two hours with Puff Paint - Lisa

Late post for this as I had a bit of trouble with Windows 10 & blogger!

So here are my samples from two hours playing with puff paint. We used spatulas, old paint brushes, scrappers - in fact anything to hand. Remember when you are heating puff paint ensure you are on working with a tile to hand for your heat gun and to work in a well ventilated area.


By applying different levels of heat to the paint raises it in different ways.


I had a go at scrapping through a stencil.


I tried all types of materials for background fabrics and white puff paint. You could colour this first although I prefer to paint it after it has been heated and dried.


Not in two hours, but later, I painted all my samples with Jacquard Lumiere and add some gleam to some, just randomly rubbed on top.
 
 
This sample had puff paint through scrim, heated and then painted.


The stencilled sample gave a really good surface when painted.
 
 
This was a sample I made some time ago where I used some silk paper as the base fabric.
 

Saturday, 19 September 2015

Two hours with Puff Paint - Denise

For the second of our sessions, we decided to play with Puff Paint. There are several makes available, and we tried two of them: we both used Craftynotions Black Puff Paint, and Lisa also tried Tulip White Puffy Paint, which I'd tried on a previous occasion and didn't get on with as I didn't like the consistency. We took some of these ideas from Sarah Lawrence's book '... it's just Puff Paint' and others from Maggie Grey's 'Raising the Surface with Machine Embroidery'. Some are things I've tried myself and found successful.


Black puff paint on poly-cotton: half textured, half smooth

First, I spread the puff paint onto black poly-cotton using a tongue depressor. (I sometimes use an old cut up credit card or a drink stirrer to take the paint from the jar and to spread it.) I then patted the paint with the depressor to create a textured surface before zapping it with a heat gun.
Half heated sample - you can see the matt effect when it is 'cooked'

As it is heated, the puff paint looses it's shine and goes matt; it is finished when no shiny areas remain and you may need to apply head a second time if the paint is very thick.


You can then colour the puff paint using your favourite acrylic based paint. I also use Pearl Ex mica powders either brushed on their own or mixed with a little water if I need a more intense colour. My favourite paint is Lumiere, which gives an even coverage and good colour. On this sample I have used Halo Blue Gold:


Puff paint incised with the end of a paint brush and painted with Lumiere Halo Blue Gold
I know it looks green - I think the colour is interacting with the black!

You can do many things to create texture:


Puff paint through net, burnished with gilding wax (Gleam)
In this sample, the puff paint was spread in a thin layer through net, then zapped and burnished with gilding wax.


Puff paint through net coloured with (left to right) Pearl Ex mixed with water, dry Pearl Ex and Gleam.
In this sample, the net was removed once the puff paint was spread through, then zapped. It was coloured with Interference Violet Pearl Ex powder, both dry and wet, and Gleam.


Puff paint through organza and zapped burnished with Gleam
 Organza was used to spread over the puff paint, left in place and zapped, then burnished with Gleam.

Puff paint stamped, zapped and burnished with Pearl Ex and Gleam
Stamps can also be used on puff paint. It does need to be spread fairly thickly before applying the stamp. This was zapped and burnished with dry Pearl Ex and Gleam. After impressing the puff paint, I used the stamp to print onto a piece of white fabric. The applied puff paint wasn't thick enough to give a very raised effect, but could be enhanced with other media and stitch.


Puff Paint stamped onto white fabric
I did try a few more techniques, and will be adding them in the next few days.

Denise


Wednesday, 9 September 2015

2 hours with Tyvek - Lisa

Denise & I spent a nice, calm 2 hours making Tyvek beads. As I haven't made these before I took some notes!

If you haven't used Tyvek at all before you need to work in a well ventilated room because you do get fumes from the heating process, and have a silicone sheet or tile handy to rest your heat gun on.

Denise had lots of ready coloured Tyvek available, and the top tip here is pre-cut your strips or long triangles the same size if you want your beads the same size. We liked the Tyvek coloured with Jacquard Luminere, although lots of different paints etc. colour Tyvek well and we wrapped the rolled strips with polyester thread, metallics give a nice finish.

Denise wrapping the first bead - the polyester thread acts as a resist

My first attempt with a snipped strip

A thinner strip to make a smaller bead - heating the flattish part first helps to seal the bead


Double snipped strip

After heating

Using a triangular strip of very light weight uncoloured Tyvek

The Tyvek was quite difficult to heat and tended to completely disappear in parts

Tyvek covered with synthetic lightweight fabric

Mmm - this didn't work, maybe too thick

I tried bonding the fabric to the Tyvek but again not very successful
If your Tyvek goes a bit 'blobby' looking, give it a quick roll across your tile while it's still hot and you get a nice smooth effect. Looking forward to next week!